
Mastering wood finishing techniques is an essential skill for anyone involved in woodworking, as it provides the crucial foundation for achieving results that are both visually impressive and long-lasting. Whether you're a DIY enthusiast who loves creating pieces on weekends, a professional craftsman dedicated to the trade, or someone exploring woodworking as a new passion, understanding the right finishing methods can completely transform your wood furniture and other wooden pieces into durable, eye-catching works of art that reflect your attention to detail and craftsmanship.
In this guide, we'll explore the top techniques, finishes, and materials you need to achieve a professional-looking wood finish that not only enhances the beauty of your projects but also significantly improves their longevity, functionality, and overall appeal.
1. Understanding the Wood Finishing Process
The finishing process is not just about making wood look good on the surface—it’s about creating a protective layer that shields the surface, enriches the grain, and guarantees durability through years of use. A well-applied finish protects your project from scratches, environmental moisture, UV rays, and daily wear, all while adding a pleasing aesthetic value that complements the wood’s natural beauty.
2. Choosing the Right Materials for Wood Finishes
To apply effective wood finishes, you'll need high-quality materials like fine brushes, lint-free cloths, various types of sandpaper, and the appropriate solvents for your chosen finish. Selecting the right tools and materials is absolutely essential for ensuring a smooth, even surface and long-lasting protection that can stand up to the demands of everyday use and environmental conditions.
3. Preparing Wood Surfaces: Sanding and Cleaning
Before applying any finish, sanding is an indispensable step that can make or break your results. Start with medium grit sandpaper (around 120 grit), then gradually work up to finer grits (up to 220 grit or higher) for a silky-smooth surface that’s ready to accept stains or sealers. Follow up with thorough cleaning using a tack cloth to remove all traces of dust, dirt, and debris from every angle and nook of the surfaces to ensure nothing interferes with adhesion.
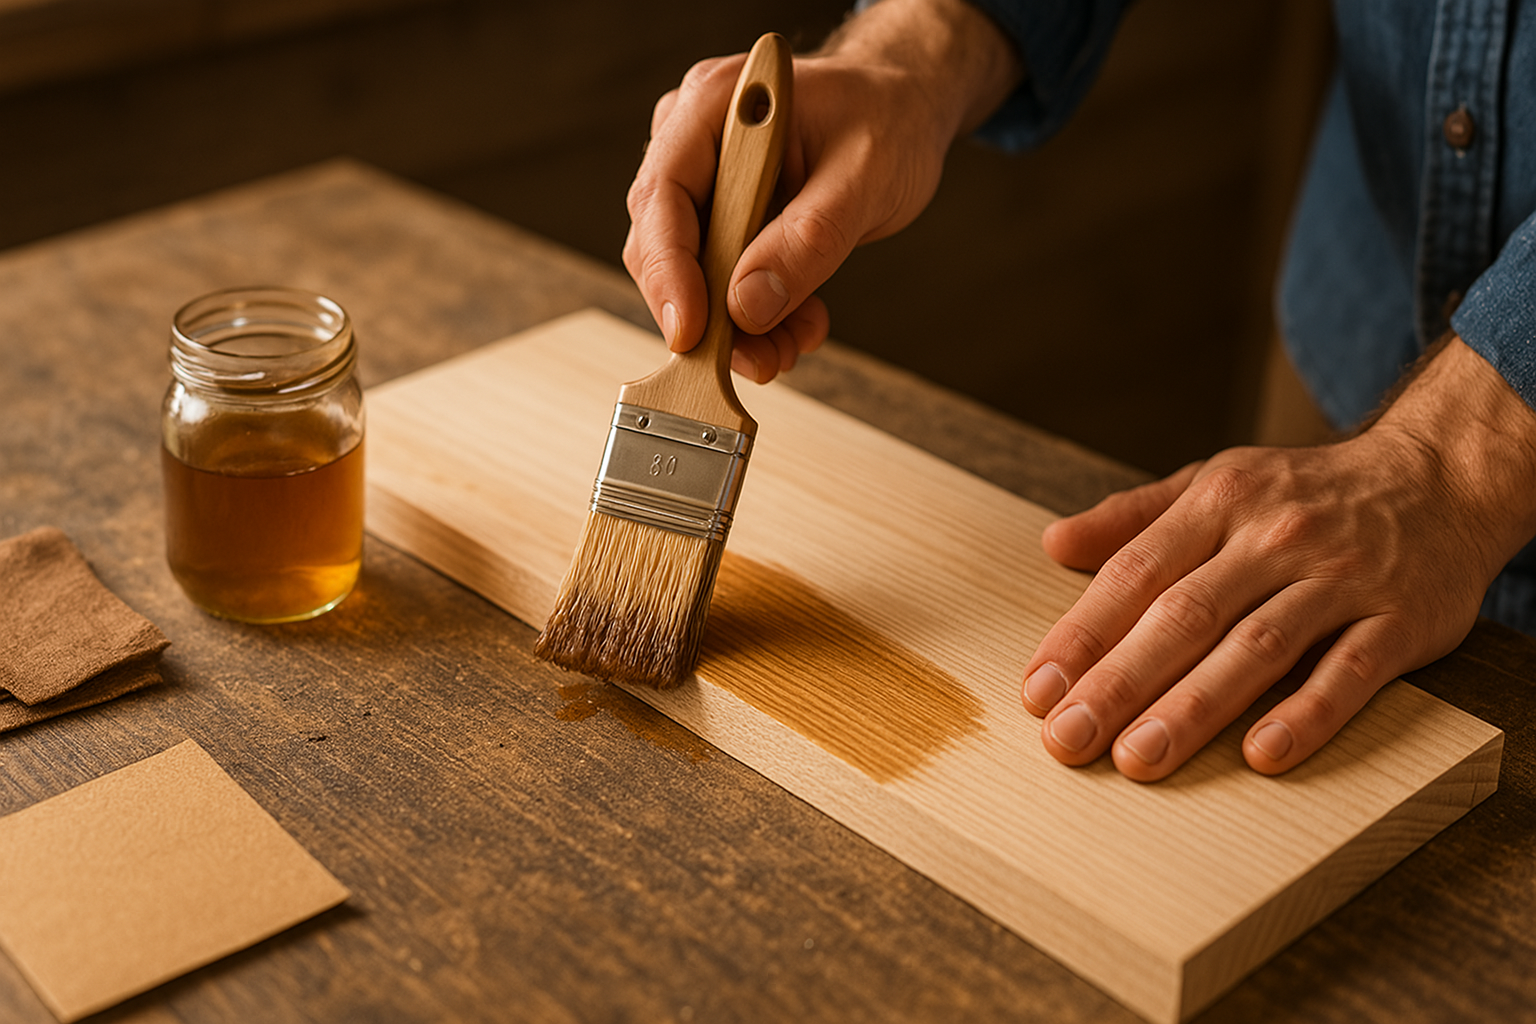
4. Staining Wood: Adding Color and Depth
Staining is a technique used to either highlight the natural beauty of wood or alter its tone to match a desired aesthetic, all while showcasing its unique grain pattern. Apply stains using a quality brush or clean cloth, allow it to penetrate the wood fibers deeply, and then gently wipe off the excess to reveal a uniform, enriched tone. Staining wood enhances its visual character, creates depth, and makes your wooden pieces stand out with a distinctive, warm appearance.
5. Sealing the Surface with Clear Coats
Sealants are used to lock in the stain and create a base layer that prepares the surface for additional top coats. Opt for clear finishes like polyurethane, varnish, or shellac depending on the level of durability and sheen you’re aiming for. These coatings not only enhance the shine, but they also serve as a tough barrier against scratches, spills, and daily wear, significantly extending the life and beauty of your furniture.
6. Applying Top Coats: Shine, Satin, or Glossy Finishes
Your final coat defines the ultimate aesthetic of your project—whether you want a subtle satin look, a bold glossy effect, or something in between. Use a soft-bristled brush or professional-grade sprayer to ensure even coverage and eliminate brush marks. Allow each coat to dry thoroughly, often for several hours or overnight, before adding another layer. Applying multiple coats builds visual richness and increases the shine, making your piece look polished and refined.
7. Waxing and Polishing for a Smooth Finish
To complete your project, use wax or polish as a final touch that provides a soft, silky surface and a luxurious feel. This final layer adds depth to the finish, repels dust, and makes routine maintenance easier. After applying the wax, buff it thoroughly with fine steel wool or a soft cloth to create an even, smooth appearance that truly makes your woodworking shine.
8. Brushing Techniques for Even Coating
Using the right brushes and mastering proper brushing techniques are crucial for achieving an even, streak-free finish. Apply with light, steady pressure and always move in the direction of the wood grain to enhance consistency and reduce drag marks. Excellent brushing not only ensures uniform coverage but also contributes to the overall smoothness and visual appeal of the finish.
9. Drying Times and Final Steps
Patience is key when it comes to drying times. Allow every layer to dry completely before applying the next to avoid sticky, uneven surfaces that can ruin your hard work. Most finishing processes recommend at least 24 hours of drying per coat. The final steps in your project should include gentle sanding, a round of cleaning, and perhaps a touch-up application of your finish to ensure that the result is flawless.
10. Maintenance Tips for Finished Wood Furniture
To keep your wood furniture looking great for years to come, regular cleaning and occasional reapplication of wax or oil are essential. Check frequently for scratches, and address any imperfections promptly. Avoid using abrasive solvents, and always dust with a soft, dry cloth to preserve the integrity of the finish.
11. Common Mistakes in Wood Finishing and How to Avoid Them
Many common mistakes can easily be avoided with a little preparation and awareness. Don’t use dirty or low-quality brushes, skip important sanding steps, or rush the drying process between coats. Use the best available materials, follow every step diligently, and constantly refine your skill by practicing on scrap boards to avoid costly errors on your actual projects.
The Role of Wood in Finishing Projects
Knowing the type of wood you're working with—whether it's softwood or hardwood—is critical, as it greatly influences how various finishes are absorbed and how the wood grain reacts to stains and paint. This knowledge allows you to tailor your finishing techniques for optimal outcomes.
Finishes for Wooden Surfaces: Varnish, Wax, and More
For finishing wooden surfaces, explore options such as varnish, wax, or different types of oil finishes. Each offers distinct benefits in terms of durability and appearance. Varnish provides a hard, clear protective layer, while wax imparts a soft sheen that feels smooth to the touch and is easy to maintain.
Brushing and Rubbing for a Professional Finish
Combine precise brushing with consistent rubbing using steel wool or a soft cloth to achieve a refined finish. This two-part approach enhances the depth of the grain and removes any excess product, giving your project a more professional and polished result.
Step-by-Step Process for Staining Wood
- Begin by sanding the surface thoroughly with medium grit sandpaper, gradually moving to finer grades.
- Use a clean tack cloth to remove all dust and particles.
- Apply the stain evenly with a high-quality brush or soft rag.
- Allow the stain to fully penetrate the wood surface.
- Remove any excess product using a dry, lint-free cloth.
- Allow it to dry fully before applying any additional coats if needed.
Choosing the Best Wood Finish for Your Project
Selecting the appropriate wood finish depends on your specific project goals and the type of use the piece will endure. For maximum durability, polyurethane is ideal, while oil finishes or wax may be better suited for a warm, traditional aesthetic.
Tips for Applying Satin Finishes on Wood
Satin finishes are prized for their soft, understated glow. To achieve the best results:
- Stir the finish gently to mix components evenly—do not shake.
- Apply the finish using a foam brush for minimal brush strokes.
- Lightly sand between coats to maintain a smooth, uniform surface.
Easy Maintenance for Woodworking Projects
To maintain the quality of your woodworking pieces, clean them with mild products, keep them away from moisture, and refresh the coats of wax or oil whenever the shine starts to fade. With proper care, your woodworking creations will remain beautiful for decades.
How to Avoid Scratches on Finished Surfaces
Prevent scratches by using protective accessories like coasters, soft pads, or runners on your furniture. Avoid dragging heavy objects across finished surfaces, and touch up the finish as needed to maintain its integrity.
Using Paint as a Decorative Wood Finish
While paint hides the natural wood grain, it's a great choice for colorful or modern styles of furniture. Finish it with a clear top coat to protect the painted surface and enhance its durability against everyday use.
Final Touches: Bringing Out the Depth of the Wood Grain
Highlight the depth and texture of the wood grain with the final application of wax or oil. Buff in circular motions using steel wool or a soft cloth to bring out a vibrant, dimensional finish.
Brushing vs. Spraying: Which Technique Is Better?
Brushing provides precision and is ideal for detailed, smaller projects, while spraying delivers a smoother surface finish, especially for large pieces like wood furniture where efficiency and consistency are key.
By mastering these detailed wood finishing techniques, you can elevate each woodworking project to professional standards and create finishes that are both stunning and protective. Whether you're crafting a rustic wooden bench or a sleek modern coffee table, the right finish can dramatically enhance both appearance and longevity.
Now it’s time to grab your best brush, prepare your finest sandpaper, and set out to transform raw wood into a polished masterpiece that speaks volumes about your skill and passion.
Want the complete plans and step-by-step training?
Get instant access to thousands of detailed woodworking projects.
Join The Training